
Workshop
July 2006
 | The workshop looks like a good little building, however when you look closely you see that it not quite as sturdy as it appears. The roof is made of corrugated iron, topped with ply and then felted providing a not so good home for a few families of bluetits, judging by the chicks that keep falling out of the nests. The walls are a mixture of wood and brick covered in render. The old single pane windows have also seen better days, however overall it is still a very useful place for doing those little DIY jobs and has a sink and running water. The electricity is supplied by a long cable which runs along the patio wall and into the house... where you'll find a plug! Yep, it is basically a long extention lead! In the above photo you can see the trellis that made the temporary boundary fence of the dog pound and the kennel behind that. |
| You can see the original building which looked quite quaint (apart from the roof). We are not sure when that photo was taken but we think it was probably in the 80's or early 90's. The paths have long since disappeared under patio and pea shingle. |  |
 | During March we converted the old dog kennel at the end of the workshop into the Taj Mahal ready for our new family members, the ladies. |
Time for the rebuild of the mouse (and rat) infested workshop. The first job was easy, demolish it by driving Izzy into it and pulling the whole thing down. Oops, I disconnected the electrics (simply take the plug out in the utility room!) but forgot to turn off the water, which I realised when the roof caved in and smashed the sink. Nice fountain! Uncovering the structure of the building showed that it too has had a varied history with many changes thoughout the years.


We dug out the foundations and got the walls built before the pre-made trusses where delivered and the roof put on.


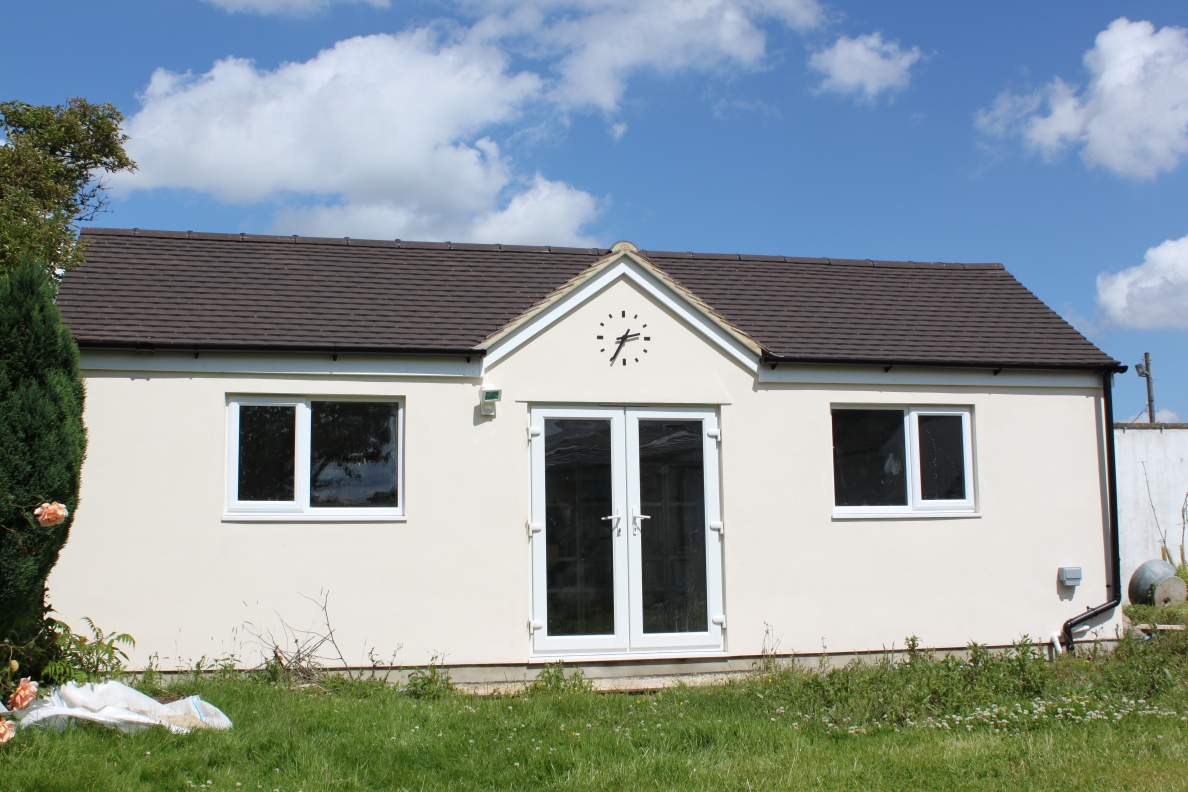
The new windows and doors were put in and the initial scratch coat was put on to make the building water tight. Now it is my job to get inside and start doing the electrics and insulation.


Octobery 2011
The rendering was done on the house and the workshop so I got down to rubbing down all the walls and Karen painted everything. It is looking really good now but no real progress has been made inside yet. We need to get this building finished before we can work on the hot tub room.
February 2012
I installed all the cabling inside the workshop ready for when the power is finally installed.
April 2012
I fitted the outside socket and security light to the workshop, put in the electrical circuits and started insulating with remaining Celotex.
May 2012
Luke helped me empty workshop so I could complete the room ready for Jason and Steve to plaster. I finished putting in the Celotex insulation and Karen helped me unload 36 sheets of moisture-board. I put up the ply and plasterboard at one end of the room so that I could put and connect up the electrics to provide power and lighting. Jason came and helped finish the boarding ready for he and Steve to plaster. After the plaster was dry I fitted window boards and a new door stop. During May I took a week off work to work on the vege patch but in the evenings I continued with the workshop, painting the room, including the floor and installing cupboards and lights. I put in the window boards so the room is almost ready to be occupied.
June 2012
I built the shelving and with Emma's help we emptied the contents of the hot tub and barn, cramming it all into workshop. I fitted the worktops and connected up the water supply so the room is slowly coming together. I also however fitted the external clock to the workshop but just need to find some chapters to finish it off.
February 2013
 | As you can see, the workshop is definitely now lived in so I have finally installed the heater so I can work in the warm. |  |